
Custom for a Washing Machine Replacement Clip for Home
- Ahmed Gamal

- Apr 26
- 2 min read
When a small plastic clip breaks on your furniture, appliance, or office equipment, it can be frustrating to find a replacement. Often, the exact part is unavailable or expensive. A practical solution is to create a custom replacement clip using 3D printing. This method saves time and money while giving you a tailored fix that fits perfectly. This guide walks you through the simple steps to design, print, and assemble your own replacement clip.
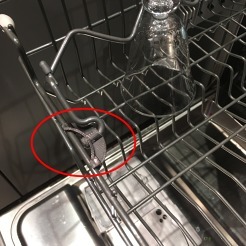


Measure the Broken Part Accurately
The first step is to take precise measurements of the broken clip or the area where it fits. Use a caliper or a ruler to note down all critical dimensions such as length, width, thickness, and any holes or slots. Pay attention to details like curves, angles, and locking mechanisms. Accurate measurements ensure your replacement clip will fit and function as intended.
Measure multiple times to confirm accuracy
Sketch the part with dimensions for reference
Note the material thickness and flexibility if possible
Design the Clip Using 3D Modeling Software
Once you have the measurements, create a digital model of the clip using 3D design software. Programs like Tinkercad, Fusion 360, or FreeCAD are user-friendly options. Start by drawing the basic shape, then add details such as clips, hooks, or grooves.
Use your sketch as a guide
Keep the design simple but functional
Consider the strength and flexibility needed for the clip
Save the file in a format compatible with your 3D printer (usually STL)
Prepare the 3D Printer and Print the Clip
Before printing, set up your 3D printer with the right material. PLA or ABS plastic are common choices for replacement clips due to their durability. Adjust printer settings like layer height, infill density, and print speed to balance quality and print time.
Load the STL file into slicing software (e.g., Cura, PrusaSlicer)
Check the orientation to minimize support material
Preview the print layers to ensure no errors
Start the print and monitor the process for any issues
Printing time varies depending on the clip size and printer speed but usually takes between 30 minutes to a few hours.
Post-Processing and Assembly
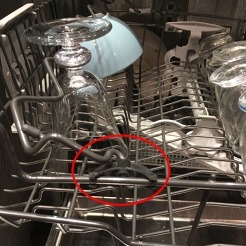
After printing, remove any support structures carefully. Light sanding may be needed to smooth rough edges or fit tight spots. Test the clip by fitting it into place and making sure it holds securely.
Trim excess plastic with a craft knife if necessary
Use fine-grit sandpaper for smooth finishes
Assemble the clip with the broken item and check for proper function
If the clip doesn’t fit perfectly, adjust the design and reprint
Practical Example
Imagine a broken clip on a home cabinet door hinge. You measure the clip’s length as 25 mm, width 10 mm, and thickness 3 mm. After designing the clip with a small hook to latch onto the hinge, you print it in black PLA. Post-print sanding ensures a snug fit, and the new clip restores the door’s function without replacing the entire hinge.


Comments